Home     About me     Recipes      Tutorials      Projects     Link Parties      Recipes From Around The World
Showing posts with label Sewing. Show all posts

Tuesday, 30 July 2013

One Big Project

Things are still quiet here on Heron's Crafts and I suppose that is because I haven't got any wonderful crafty things to share with you. Between sorting out my flat for next year and prepping for my PGCE course, I haven't had much chance to get creative. 

Except for one big project which is taking up any creative efforts I do manage to squeeze in! 
I am making a duvet cover for my new flat. This involves 500 strips of fabric sewn into 36 square blocks. Needless to say, the cutting out alone has taken a considerable amount of time! I spent nearly two days cutting out and I watched Princess Diaries while I worked (Amazing discovery that the actress who plays Christina Yang in Grey's Anatomy is Vice Principle Gupta in Princess Diaries - I was overly excited about this, but you had probably already noticed!).

Anywho... here is a sneak preview of one of the blocks, I have sewn 10, so just 26 to go!


What are you working on right now?

Love Rebecca

Image Map

Sunday, 21 April 2013

Herringbone Charm Square Bag

Well, its been pretty quiet here at Heron's Crafts for the past couple of weeks, it wasn't planned but just kind of happened! But I have been productive in my time away, and I have plenty to share! I am now back in York ready to start my final term in this City, the last stretch of my Psychology degree.


I must confess that this bag took my quite a while - I blame the chevrons on the front! But it was worth it! I am so pleased with how it turned out and have already used it several times! I am totally in love with the colours and the pattern on this bag!

I was inspired by the tutorial for herringbone hot pads on the Moda Bake Shop and used Moda batik charm squares to make the bag. The bag is made up of four herringbone patterns with some more fabric in between to frame it nicely.


Thank you for your patience with my lack of posting this month, I am back on it now I assure you!

Hope you are having a delightful weekend!

Love Rebecca

Image Map

Tuesday, 9 April 2013

Facing my Sewing Nemesis and Finishing a Skirt

Do you have a sewing nemesis? A project that never fails to frustrate you? (and by extension those around you *sorry Mum!*) A pattern that your cannot seem to get right or a fabric that you just cannot work out? Or maybe it is a recipe ...a pie, a souffle or a cake that no matter how hard you try, you can't seem to get right?

Well sewing clothes has always been my sewing nemesis. I have a bag in my wardrobe where half finished projects go to hide. There is the skirt I tried many years ago, the shirred top from two years back and the jean-to-skirt refashion from I don't even know when! This week I nearly added a new skirt to the bag. Nearly. Today I won and completed that skirt. 

New skirt...finally! And the t-shirt is my latest freezer paper project -
I am a big Friday Night Lights fan (but I am only on season 2 so no spoilers please!)

The skirt is adapted from a simplicity pattern that I bought a while ago for an elastic skirt. I made it as per the pattern and didn't like it. Mostly because all you could see through my t-shirts was a (very large) waist band where the gathers on the elastic were just too much. I should have realised that I didn't like elastic waistbands b looking into my wardrobe - about 7 skirts - all with zippered waistbands...lesson learnt!

So, I decided to unpick it and make a waistband with a side zip. Easy right...actually yes it wasn't that hard when I FINALLY got my head round inserting a zip, adding a lining, adding gathers and drafting a waistband...which took a while. I have this thing where I cannot really sew something until I have made it in my head first...that sounds quite crazy I know, but I have to fully understand everything I am going to do and I just couldn't get my head round it. I woke up a few times last night thinking about this skirt and how it would work. Luckily,whatever midnight thinking I did must have paid off because by this morning, I knew exactly what I needed to do!

So, after spending the morning on my dissertation, I spent the afternoon at my sewing machine. And now...I am a very happy person! With a new skirt perfect for summer days, school placements and shopping trips!

Have you faced your nemesis?

Love Rebecca


Image Map

Saturday, 6 April 2013

Framed Patchwork Cushion to Showcase Beautiful Fabric


It has been months since I shared a cushion ...weird!
I seem to have this thing with cushions. This thing being that I have many many cushions (12 on my single bed at last count) but never have TOO many, y'know? Well, recently I have been restrained but when I went fabric shopping this week, a cushion just popped into my head so I had to go for it!

A couple of years ago, my parents spent three weeks in America - they started in San Francisco and ended up in Las Vegas, taking in several places in between. Being awesome parents they wanted to get me a nice present and, well, they couldn't have done a better job. They arrived home armed with chocolate (of course) and fabric! Native American inspired fat quarters to be precise. Beautiful batik patterns, gorgeous colours and bold prints. I was in heaven. But they were so gorgeous that I didn't know what to do with them. It had to be perfect and I didn't want to waste them. I made a wall hanging with some of them to showcase the fabric, but the rest has been sat in my sewing box ever since. Occasionally I would get it out, marvel at how pretty it is and then put it back again as no inspiration hit me.

Well, as I was saying, this week I was fabric shopping when I found this gorgeous fat quarter. It only cost me £1 (bargain!) and it was a night sky complete with moons, stars and swirling clouds. And then it hit me. Finally, inspiration struck and I knew that this fabric was destined to become a cushion, framed by some of the American fat quarters. And here it is!

I thought I would share the tutorial for this cushion because
 a) it is simple but effective 
b) It is a great way to showcase fabrics without them getting lost in whatever patchwork pattern you have decided to construct.
c) You can adapt it to the sizes of your fabrics - increase or decrease the number of frame fabrics, change the size of the centre panel, whatever you want!

Materials
Cushion inner (mine was 17"x17")
Main Fabric
Backing Fabric
(I use sheeting for the backing)

1. Map out the sizes of your strips and centre piece. Add 1/2" seam allowance to the length and width of every strip. 
My strips measured...

Centre - 8 1/2" x 8 1/2"
1.  2" x 8 1/2"
2. 2" x 11 1/2"
3. 3 1/2" x 11 1/2"
4. 3 1/2" x 15 1/2"

To make a cushion with a centre panel and two frames, you will need 1 square and 8 strips of fabric.


2. Sew the strips on in the order denoted by the numbers on the above diagram. Simply pin the fabrics right side together and sew down the edge with a 1/4" seam. Press open the seams

Front

Back

3. Continue adding strips until you have sewn all of the strips onto your cushion, pressing the seams as you go along. 


4. Cut out your backing pieces, they should be 1/2 an inch wider than your cushion (e.g. 17 1/2") and 2/3 as long (e.g. 12-13"). Add an extra half an inch to the length and make a fold over hem along one long edge on each piece. Pin one piece on top of your cushion square, right sides together. Pin the second piece to the bottom, as shown in the pictures, to create an envelope back.

1st back piece

2nd back piece

5. Sew all the way round the square of your cushion. Turn right side out and insert your cushion inner.


And that is all there is to it! 

Do you have any fabric that you are saving for the perfect project?

Love Rebecca


Image Map

Saturday, 30 March 2013

Doctor Who is Back!

Finally, Doctor Who is back! Which means that I can share my TARDIS cushion that I made last year. 
I found this black, star-studded felt in hobbycraft last Summer and knew that I had to buy some although I had no idea what for. Shortly after, I realised that it was the perfect night sky, and the tie-dye pink/blue fabric on the borders of the cushion looked quite like a galaxy! So my cushion was born.
I used simple applique to add the pieces that make up the TARDIS itself and then embroidered the words.


Did you watch it tonight? Thoughts?

Love Rebecca


Image Map

Tuesday, 26 March 2013

Patchwork New York Tote Bag

Last week my Mum and I spend a fantastic day at the NEC in Birmingham at the Sewing for Pleasure and Hobbycrafts show. I came home with a stack of fabric for several projects that I have on the horizon. I also picked up a pack of Makower NYC fat quarters. I knew as soon as I saw them that they would be perfect for a patchwork bag, and at the weekend, I sewed this...


I adapted the 'Avril's Bag' pattern from the Simply Bags book sold at my local quilting shop Goose Chase Quilting. Between us, my Mum and I have made most of the bags in this book and we really like how they turn out. I decided on this large patch bag in order to really showcase the NYC skyline fabric that I had bought. I also added an inside zip pocket for my phone and other little bits.

I am really pleased with how it turned out and it only took me an afternoon!

What have you been sewing lately?

Love Rebecca

Friday, 22 March 2013

Bunny Treat Bags


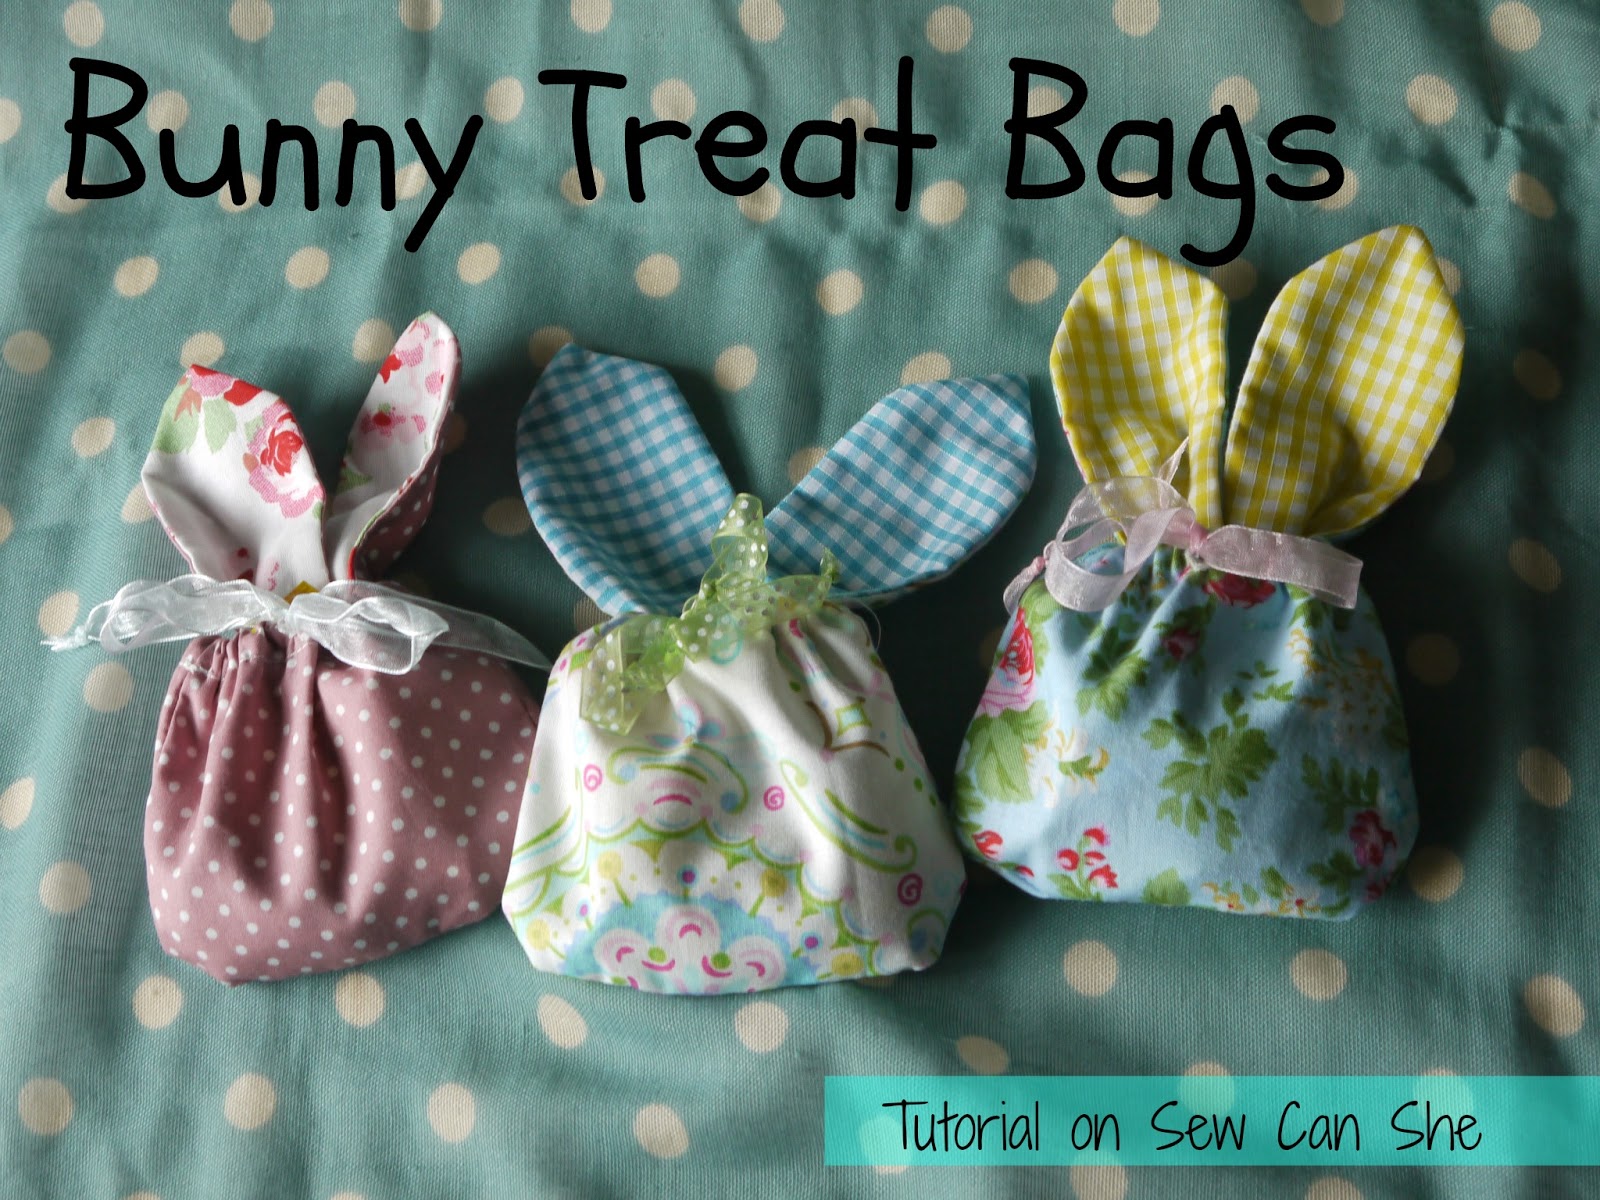
There is just one week to go until Easter and as one would expect, the blogosphere is teeming with Easter projects. I came across this adorable tutorial on Sew Can She a couple of weeks ago and couldn't pass it up! I raided my fabric stash for my most spring-like fabrics and set to sewing. 

The tutorial uses charm squares but I didn't have any of those so I cut squares out of the fabric I had on hand (it is easier if you cut it into squares first) 
I cut three squares from the outside fabric and one square from the contrasting inner ear fabric to create my bunny pouches. They are the perfect size for a mini pack of Cadbury's Mini Eggs and some mini Creme/Caramel eggs. 
I think they would be perfect for an Easter egg hunt, small Easter present or, as I did, perfect as treats for a movie night!


I made up 5 in an afternoon, the tutorial was easy to follow and I was delighted with the results!
And the recipients seemed to like them as well...plus they came up with several uses for the pouches after Easter...

Jewellery Holder
Lavender Bag
Penny Sack
Hair tie Holder

What would you use it for?

Have a Fabulous Weekend

Love Rebecca


Image Map

Friday, 1 March 2013

Library Book Bag


I actually made this bag for my Mum's birthday back in September but I remembered about it this week and thought it would be a perfect Storybook Craft Project. 

I made it so long ago, I don't have a tutorial to go with it but I used the tutorial on this Don't Call Me Betsy to make the bookshelf panel - I adapted the sizes to fit onto a bag the size I wanted to make. I then used the panel as the front of the bag and put it together with some spotty fabric for the back to make a simple shopper bag. I love the fact that the pattern uses selvages for the book titles - it is pure genius! I now have a bag of them that I refuse to throw out!

To give it to my Mum, I filled it with books and book goodies for a book-lover's goody-bag!


Have a great weekend 

Love Rebecca

Image Map

Tuesday, 5 February 2013

Freezer Paper Stencilled Camera Lunchbag


Happy Tuesday! And a very happy Tuesday it is because my lovely Mum is coming to visit this afternoon! So whilst I am off shopping and having hot chocolate with my Mum, I will share with you the birthday present I made for my dad!

Two things you should know about my Dad that explain this gift
1. He is really into photography
2. He takes his lunch to work in an old shopper bag

Well, I just had to fix that so I decide to make him is very own personalised lunch-bag big enough to hold his lunchbox and fork.

It is another freezer paper project, and an example of a trickier stencil that worked out just as well - I was really pleased with it although it took me a couple of tries to get it just right!

I downloaded this gorgeous camera graphic from Stephanie Corfee and adapted it slightly to make a freezer paper stencil - I basically simplified it to make it a bit easier to cut out with an exacto knife!

I then made the piece of fabric below. I had to make a new stencil for each camera because it was so fiddly but that's ok! It only took me one evening to practise, print and let it dry ready to sew up the next day.


So once you have you painted fabric, onto the bag!

Materials
Calico, printed and plain
(That's it!)

1. Cut four squares of calico 9 x 9 1/2 ". One should have your design on it (I chose to have mine at an angle) and the other three should be plain.


2. Pin 2 plain pieces of calico right sides together and sew three sides, leaving one of the shorter sides open. You should also leave a 2-3" gap in the short side that you do sew.
Pin right sides together your two remaining calico pieces (1 plain, 1 printed) and sew as above.


3. Fold so that the side seam and the bottom seam line up and you have created a point (as in picture below). Draw a line across where it measures 2 1/2 ". Pin. Repeat on the other side and both corners of the lining piece. Sew across the lines and turn right side out to ensure that it matches up on the right side. 
Snip the excess fabric from the corners.


4. Next job is to make the straps. First, cut two pieces of calico 18" x 4". Press in half and then fold the raw long edges into the mid-point fold. Press over so that your piece is now 1" wide and all raw edges are hidden. Sew down each long side.


5. Turn outer bag piece right side out and place inside the lining so right sides are together. Pin the straps in between the lining and outer bag piece about 2" from the seams. Sew all the way round the top of the bag, making sure to catch the straps as well. Turn right side out through the hole you left in the lining and whip stitch it shut. Press the bag.


And there you have a finished printed lunchbag. Make sure you heat-set your fabric so it will be washable too!


What would you print on yours?

Love Rebecca

Image Map

Friday, 1 February 2013

Hungry Caterpillar Shopper Bag


If you have been reading Heron's Crafts for a while you may have picked up on my love of The Hungry Caterpillar - if not - then why not check out this Hungry Caterpillar Applique Cushion I made a while ago!

This week's project is way simpler than that cushion, and just as effective! 
I have always struggled making sewing machine ruffles so this ruffle is made by hand, I have included instructions on how I made it but if you have a preferred method of ruffling...go for it!

I love using freezer paper to make stencils so thought it was time to give this iconic character a go.
 I am really pleased with how it turned out!

If you would like to give it a go, here are the instructions...

Materials
Plain shopper tote
Green, Red, Black fabric paint (I used Dylon)
Hungry Caterpillar spotty fabric
Needle and Thread

1. Using an exacto knife, cut out the outline of the hungry caterpillar from freezer paper (I have included my template as a download below). Iron onto your bag and paint. If you are new to freezer paper stencilling, I have a step-by-step tutorial here.

I did the green first and then once it had dried, the red and finally the black details. 


2. Once your hungry caterpillar is dry, its time to think about the ruffle on the top. Cut a piece of fabric 6 1/2" by 22". Fold it in half and sew all the way round, leaving a 2" gap on the longest edge

3. Turn the strip right sides out through the gap and press to close. Make sure you use a pencil/pen to poke out the corners.


4. Thread your needle with a long piece of thread and sew large stitches all along the long edge (with the gap in). When you get to the end, gently pull to gather the fabric loosely.


5. Pin each end down to the two edges of your fabric and play around with your gather distribution until you have a ruffle you are pleased with. Take your time here, get it just how you want it and pin in place. With your sewing machine, sew a straight line right across the top, attaching the ruffle to the bag. Unpick your large gathering stitches.


6. Remember to heat set your fabric paint according to packet instructions but other than that, you are good to go!

Here is the downloadable template...


Hope you enjoy your weekend!

Love Rebecca

Image Map

Saturday, 26 January 2013

Fabric Bookmarks - Scrap edition


So yesterday I shared with you my tutorial for easy fabric bookmarks and I promised you a variation today so here we have scrappy fabric bookmarks.

Are you like me? 
Do you have piles of fabric scraps - really cute pieces that you just don't know what to do with? 
Well this is a great scrap - busting project!

I took a pile of my scraps, sorted by colour and followed this tutorial to make these bookmarks!

One has already been claimed by my housemate so they are a hit!

I will be linking up to Rosie at Craftbotic's Fabulous Craft Challenge for 2013 - January was projects with leftovers. Why not join us? I am looking forward to next months!


Have an awesome weekend!

Love Rebecca

Image Map

Friday, 25 January 2013

Where My Wellies Take Me - Bookmarks

Its Friday! Finally! I am so excited for this weekend because my parents are coming for a visit which is super fun! Also, it will mean that a very busy week will be over...just the small matter of a presentation that I barely understand...I'm sure it will be fine ...right?

Anyway, while I am trying to avoid thinking about said presentation, how about a storybook craft project? This week's project is simple, adaptable and personalise-able. 
I will be sharing another variation tomorrow!


These bookmarks are inspired by the book Where My Wellies Take Me by Claire and Michael Morpurgo. It is one of the most beautiful book I have come across in a long time. It follows a young girl as she walk through the countryside, and alongside water-coloured landscapes, beautiful sketches and lift out pages, there are a series of poems that fit perfectly with the portrayal of the English countryside. Can you tell how in love I am with this book - I haven't even been able to find time to finish it yet!

source

Anyway - it inspired me! And I created these bookmarks inspired by the illustrations of the countryside!

Materials
Fabric
Interfacing

1. Cut strips of your chosen fabrics, pin right side together and sew. Build these up to the desired size - must be at least 4" x 8". Iron down the seams


2. Cut a piece of interfacing 4" x 8". Pin to the back of your fabric.


 3. Trim the fabric to the size of your interfacing


 4. Fold in half, right sides together and sew all the way round, leaving a  gap in the middle of the long edge. Trim the corners and turn right side out, poking the corners out with a pencil


5. Press to close the gap neatly and top stitch all the way round the bookmark


And that is all there all there is too it - easy right! Why not give it ago?! I would love to see if you do!


Hope you have had a great week!


Love Rebecca


Image Map
Related Posts Plugin for WordPress, Blogger...