

I have designed it to contain the following essentials...

Tissues
Suncream
Hand Sanitiser
Lip Salve
A couple of Plasters
Mints
Hair Ties
Sanitary towels
Emergency Money (and by emergency I mean Ice Cream!)
The pouch has a main inside compartment to store...

And a side zip pocket to store...
 |
| A couple of plasters and a selection of hairties |
Finally there is an inside zip pocket for your money!

So are you ready for the tutorial? Lets get started!
The pouch can be made out of two fat quarters - one for the lining and one for the outside. (If you don't mind the lining being the same fabric as the outside, you can get this all out of one fat quarter!)
So choose some fantastic festival fabric and off we go!
Materials
1 Fat Quarter Lining
1 Fat Quarter Main fabric
1 7" zip
1 5" zip
1 4" zip
Heavyweight interfacing
1. Cut your fabric
Main colour
1 x 4 1/2 x 9"
2 x 7 1/4 x 7 1/4"
2 x 2 1/2 x 1"
Lining Fabric
1 x 5 x 11"
2 x 7 1/4 x 7 1/4"
Interfacing
2 x 7 1/4 x 7 1/4"

Inside Pocket
2. Take one lining piece 7 1/4 by 7 1/4" and the main fabric piece 4 1/2 x 9". Press the lining in half to create a fold line. Press the main fabric piece in half length ways and width ways to divide the piece into four.

3. Lay the main fabric piece on top of the lining, right sides together, aligning them using the centre fold. The short fold on the main fabric should be 1 1/2" away from the top of the lining piece. Pin in place.

4. Draw a rectangle on the main fabric 1/2 " down from the fold. Rectangle should be 3 1/2 " x 1/2 "
Draw a line across the centre with triangles at either end as in the picture below

5. Sew around the outside of the rectangle. Cut along the inside centre and diagonal lines that you drew in step 5. When you cut, you should go through both pieces of fabric.

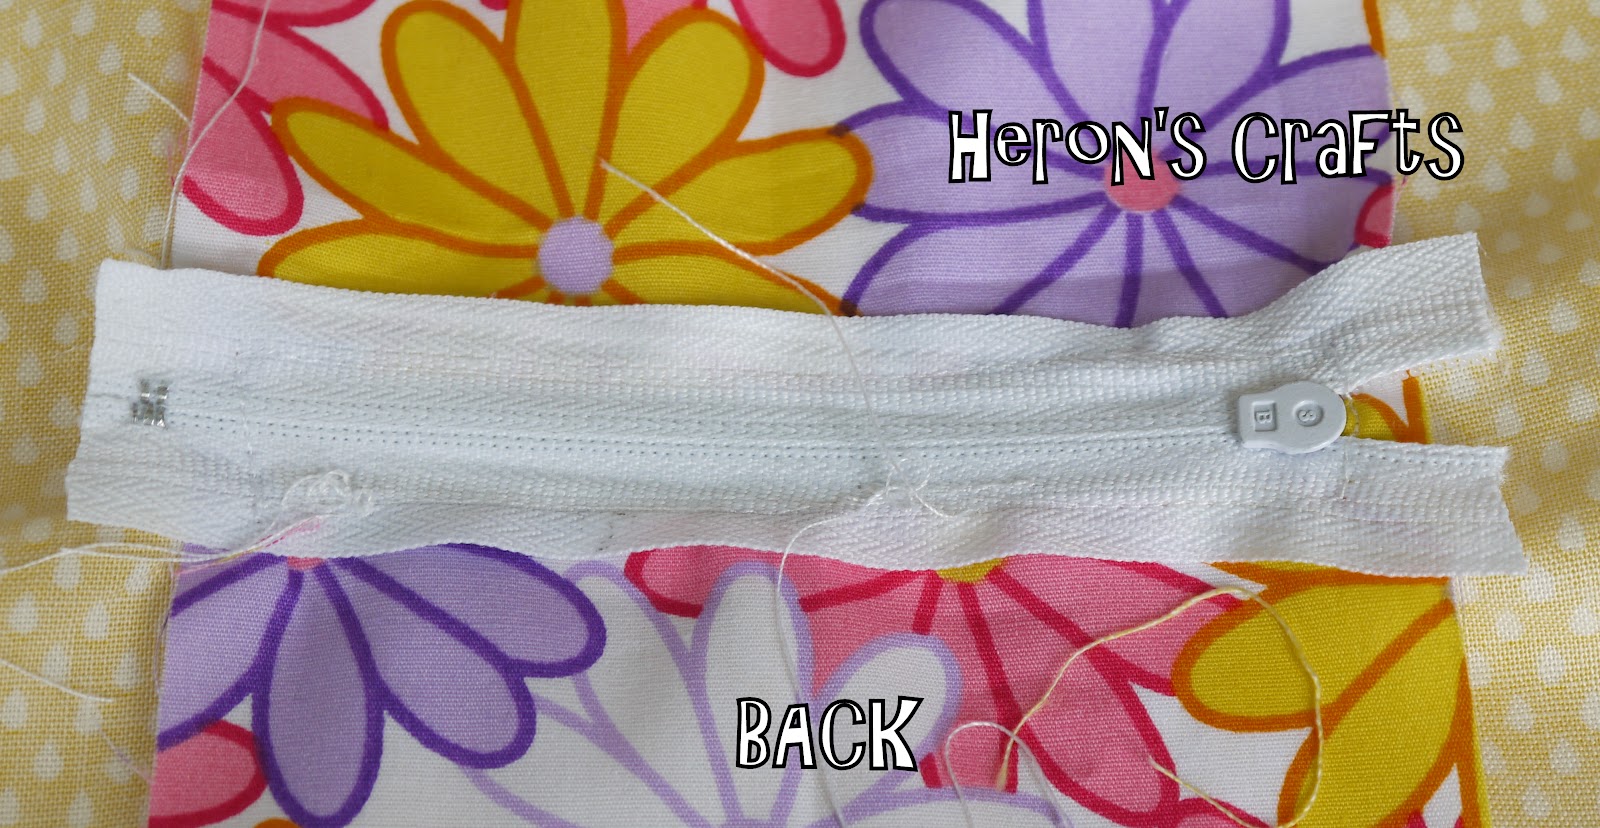
6. Pull the main fabric through the hole you have created and press. It should look like the pictures...
 |
| Back |
 |
| Front |
7. Align 4" zip in the hole so that the zipper pull is available on the lining side. Pin in place
 |
| Front |
 |
| Back |
8. Using the zipper foot on your sewing machine, sew all around the zip on the lining side. Trim the zip to size

9. To complete your pocket, fold the main fabric in half using the pressed line you ironed earlier. Pin so that all of the raw edges are matched. Next, pin the lining fabric out of the way (as in the picture) and sew all three edges of the pocket, including over the ends of the zip.


10. You have completed your pocket!

Outside pocket
11. To make the inside pocket repeat the above instructions with the following alterations.
a) Use the 7 1/4" x 7 1/4 " main fabric and 5 x 11" main fabric
b) Use the 5 " zip
c) Draw a 4" rectangle to make the hole for your pocket
Assemble Bag
12. Press your 1 x 2 1/2 " main fabric piece in the centre and then open up. You should have a fold line down the centre as in the picture. Fold the edges into the centre and press. Repeat with the second piece of fabric. These are your zip tabs.

13. Measure your zip to 7 1/4" and trim. Next, sandwich the end of the zip with a zipper tab. Sew a straight line across to attach. Repeat with the other end.


14. Lay out your fabric in the following order, making sure to line up the top edges together. First, interfacing, then lining right side up, then zip right side up, then main fabric piece with pocket attached right side down. The top of the pocket should be nearest the main pouch zip. Pin together. Using the zipper foot, sew straight across top edge.
 |
| This picture is to show you the order, make sure you line up the top edges of all components as in the next picture |

15. Next, layer up rest of the pieces. First interfacing, then lining and pocket right side up, zip (with other pieces attached) right side up, main fabric piece right side down. Line up the top and pin. using zipper foot sew across top.

16. Open out your fabric so it looks like this.... make sure that your zip is at least half open - so that you can turn it right-side out later!

17. Bring the two outer fabric pieces together, right sides together and pin. repeat with lining and interfacing so you have a rectangle looking like this ...

18. Where the zip is, push the seam fabric towards the lining fabric pieces as shown in the picture... make sure you keep this pushed like this when you sew!
 |
| sorry for the change in fabric in this photo - I forgot to take the picture first time round! |
19. Starting 1/3 of the way across the bottom edge of the lining, sew around the whole fabric rectangle, stopping about 3 inches away from where you started. I recommend turning the bag right side out at this point to make sure you have caught everything in the seams - it is easy to correct at this stage if there are holes!

20. Fold one corner of your outer pieces to get a triangle as shown below. You want to line up the seam that you just sewed so that it is running down the centre of your triangle (this is hard to explain but have a look at the pictures and manipulate your fabric and I'm sure you'll get it!).

21. Draw a line 2" across to make the bottom of the triangle. Sew along this line. Repeat with the other three corners until all the corners are squared off


22. Trim the excess fabric off the corners

23. Turn everything right side out through the gap you left in the lining.

24. Whip stitch up the gap in a co-ordinating thread

25. You are finished! Fill your pouch will all your essentials and get out there to enjoy the sun!
A peek inside....

Love Rebecca
Linking up to a selection of these great Link Parties


This looks so cute and quite easy to make. I need a pouch anyways to contain all my "just in case" items.
ReplyDelete--Becky
preppypremed.blogspot.com
I am finding it really useful this summer - it goes everywhere with me
DeleteThanks for a great tutorial!! The assembling bir of a zipper pouch is still quite tough to me. So good job!!!
ReplyDeleteEsther!!
haha...yeah...I have to be focused for the assembling bit otherwise it all goes wrong and the unpicker comes out!
DeleteAwesome idea, and I love the fabrics. Great tutorial. I'm hosting a linky party "One Creative Weekend" at OneCreativeMommy.com. I'd love for you to visit and link up this idea and/or anything else you'd like to share.
ReplyDeleteI will link up for sure! I still have some of the fabric left as well...more projects on the horizon I feel... :)
DeleteThanks so much for linking up at One Creative Weekend! I can’t wait to see what you link up this week.
ReplyDeletethese turned out so cute! I am totally pinning this. I can't wait to see what you'll share this week! Have a fun weekend!
ReplyDeleteHugs,
Lelanie
to-sew-with-love.com
tocookwithlove.com
villaportillo.blogspot.com
That is so pretty! I need to learn how to sew :)
ReplyDeleteStopping by from Something Swanky.
Thank you!
Delete